Along the journey so far, you have learned how to choose a niche and how to do keyword research. Now it’s time for the main course, how to start blogging for beginners. This is where you get your voice out there and start sharing your unique point of view with the world.
Start Here > Share Your Skills > Coaching > Teach Hobbies > Content Creation > Social Media Marketing > Niche Blogging > Affiiate Marketing > YouTube Creator > Email Marketing > E-Commerce > Print-On-Demand > Dropshipping > Subscription Boxes > Amazon FBA > Reviews > Resources
- 1. Choose your Domain Name and Web Host
- 2. Set up WordPress.org
- 3. Select a Theme and Design your Website
- 4. Customize your Blog Theme
- 5. Choose a Logo for your Blog
- 6. Choose your Plugins
- 7. Install Google Analytics and Google Console
- 8. Time to Write Your First Blog Post
- Wrapping Up – How to Start Blogging for Beginners
1. Choose your Domain Name and Web Host
This is the most straightforward task on your blogging journey. There are many sites where you can buy a domain name.
Usually, a domain name is included for free when you choose web hosting, so it is best to pair the two together. As an example, webworkfromanywhere.com is my domain name.
Usually, the shorter it is for the actual name, the more premium it is (i.e., expensive). Since you have to pay to keep domains, there are still some good ones out there; you just have to look. Many branding websites can help you come up with ideas.
Dot coms will be the top choice, but if you think of a really great and catchy domain name, other top-level domains like .net and .org will do just fine.
When you choose web hosting, you want to make sure that it’s:
- Easy to use
- You have room to grow
- You get your money’s worth
- Provides much-needed security
- Bluehost, Rocket.net and Hostinger are very popular website hosts
Read also: Rocket.net Vs BlueHost; and Rocket.net Vs Hostinger
2. Set up WordPress.org
This step might seem intimidating, but there is not much to it. It might be slightly different based on which hosting you chose, but this will only take a few minutes.
Now you should have access to the Cpanel, and once inside, you can install WordPress. It is usually named one-click install or something similar.
It will ask which domain you want to install WordPress on and choose your new domain to complete.
You will be able to name your website here and fill out some other information. Remember the login and password you choose because you’ll need them to log in to your website later.
Favorite this link: Yourdomainname.com/wp-admin. This will make logging into your website quicker.
See Also:
Best Resources for Bloggers;
Best Resources for Affiliate Marketing Beginners;
6 Best Website Builders for Your Online Business.

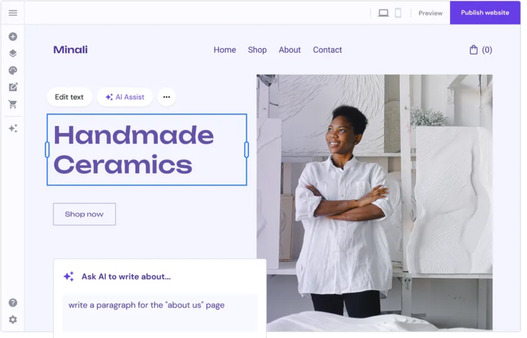
3. Select a Theme and Design your Website
Selecting a theme is as simple as clicking a button in the WordPress dashboard. Visit the Themes page under the “Appearance” menu, and click “Themes.”
I use GeneratePress which focuses on speed and usability (Google likes speed and so do your readers!)
Some popular choices will appear. You may use the WordPress.org Themes button to search for free themes.
If you choose to go the free route, just know that there won’t be as many features as the paid themes, but it’s entirely possible to make a decent-looking website for free.
Tip: Paying attention to the theme’s star ratings is also a good way to find better-looking ones.
Even if things don’t look quite right once you install, remember it’s just a shell, and things will come together once you start adding content to your blog.
The WordPress update to Gutenberg blocks is a game changer for blogging. It’s now so much easier to design your website. It offers a more visual design and you can express your creativity so much more with special blocks.
See also: Astra WordPress Theme Review for Beginners
4. Customize your Blog Theme
There are too many features to cover in this “How to start blogging for beginners” guide. Remember that the power of WordPress is in the backend.
Once you get a handle on it, you can do pretty much anything you want to change your blog with the right theme.
Under the dashboard go to Appearance>Customize. You can add your logo, change your fonts, change your colors, add your site icon (that’s the tiny image in your URL), and lots more. I recommend you have a good look through the options in Customize.
If you want more control later on, a page builder like Elementor makes it easy to customize your blog visually – just drag and drop elements and see your changes in real time, without touching any code.
More Niche Blogging Tips
- How to Start a Camping Blog and Make Money
- Guide to Niche Blogging for Beginners
- How to Choose a Niche (Without Overthinking It)
5. Choose a Logo for your Blog
This step is crucial because it’s part of your blog’s brand. You can choose from many styles, from a minimalist style to even just letters. It is essential to keep it congruent with your blog’s style.
If you plan to have a blog on a serious topic, a cartoon logo probably wouldn’t be the best choice.
You can use a free logo maker, or if you want to make a small investment, you can have a designer create one for you at Fiverr.
Canva is a good place if you want to design your own logo and has a free or premium membership. That’s where I designed my logo – you’re given lots of choices and you can keep it the same or make changes, e.g. the size, color, and wording.
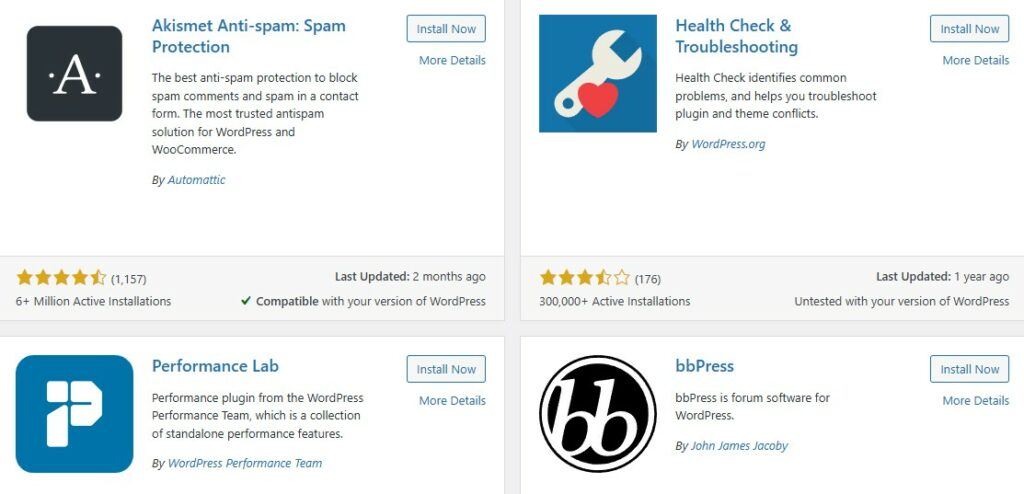
6. Choose your Plugins
Plugins are pieces of code that add new features to your WordPress blog, extend your theme’s capabilities, and personalize it as a whole or in part.
While most plugins are offered for free, there are a few that may be purchased for a price based on their specific features. WordPress.org now contains more than 57,000 different plugins in the repository.
The web hosting you chose may have automatically installed some plugins for you, but it is best to do some research and use plugins that best fit your goals. With over 57,000 to choose from, you can find a plugin to accomplish almost any goal.
Definitely install an SEO plugin to help with Google search engines. I’ve downloaded and used Yoast as my SEO plugin on this blog. It’s so handy and lets me know if I’ve missed out on adding my keywords, inbound and outbound links, meta title, meta description, slug, and lots more.
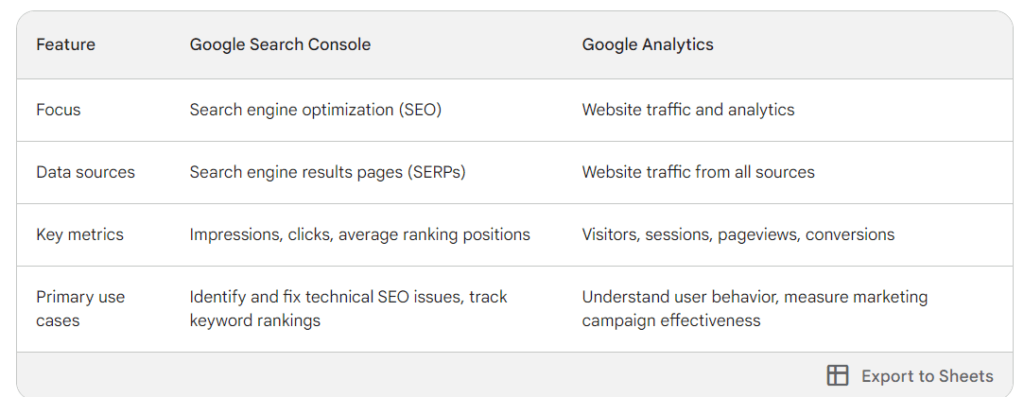
7. Install Google Analytics and Google Console
There are many reasons to install Google Analytics and Google Console, including:
- Gathering information about user activity on your site
- Learn the demographics of people who use your site
- See your most popular posts and pages
Keep things simple for now because Google Analytics and Google Console can get pretty complicated.
Learn how to extract the most helpful information, and you will learn the rest over time.

8. Time to Write Your First Blog Post
You read a blog because you want to learn more about the topic. The key to gaining a large audience and eventually making money blogging is to produce excellent content that helps your visitors.
Remember all that work you did to research keywords. Let that be your guide as you create content.
Remember not to target the exact keywords on multiple pages to avoid keyword cannibalization.
As an example, the keywords for this blog post are: How to start blogging for beginners.
Ideally, you’ll be able to post an article at least twice a week. If that’s not possible for you, start with one per week and work your way up from there. When it comes to establishing a publishing schedule, the most important thing is to commit to a realistic and achievable plan.
Remember, though, that making top-quality content is your ultimate goal.
Wrapping Up – How to Start Blogging for Beginners
Now that you have finished ”How to start blogging for beginners”, it might seem like it’s too much to handle but set your sights high.
With time and consistency, you may just be able to make your blog into a successful online business using these tips.
As your blog grows, you’ll inevitably gain new skills that you can replicate over and over. This can start out as a small project but become something that can change your life!
P.S. If you’d like extra guidance, I use Wealthy Affiliate to host my sites and learn blogging and WordPress. You can join for free and explore when you’re ready.